


Tutorial details
Requirements
Photoshop CS2
Difficulty
Since this will be a printable poster, we will make this document fairly large in a standard format.

Walls And Ground
Open the Metal overpass photo in Photoshop (new document). Use the Rulers (Ctrl + R) to create a new vertical Guide in the center of the image (it should snap).

I wanted a kinda unreal look for this image (duh), so we will play with the perspective a bit. Use the Pen Tool (P) to create a selection around the left wall down the ground.

Right-click and make a selection of the shape created by the Pen Tool. Press Ctrl + J to duplicate the selected part to a new layer. Duplicate the new layer and flip it horizontally (Ctrl + T, then right-click and click Flip Horizontal).
Hide the Background layer.

Create a mask on the top layer and mask out parts to create a symmetric passage.

Merge visible (Ctrl + Alt + Shift + E) and duplicate the walls to the final document.
Use the transform tool (Ctrl + T) to scale up the walls — both the width and height.
Go to Filter > Sharpen > Unsharp Mask and use settings similar to the ones below (left dialog below). Then go to Image > Adjustments > Curves (right dialog below).

Working On the Fashion Nerd
Open the Fashion Nerd photo in Photoshop (new document). First I will illustrate a cool technique to get a darker skin-tone, select Image > Apply Image.

Use similar techniques as described in the previous step to mirror the image and create a fully symmetrical man.

Merge and import the nerd to our final document. Use Filter > Liquify to modify the face a bit (too symmetric is just wrong).
Select Filter > Sharpen > Unsharp Mask (use provided settings).
Use selection tools to cut the hair and to make room for the water in his head (I know it makes sense doing so).
Use the Dodge Tool (O) to give the eyes a touch-up. If you are finicky, you can also spend some time moving the reflection in the right eye.
Also, use the Clone Stamp Tool (S) to make the symmetry in his face less obvious.

Cloudy Background
Import the White clouds in blue sky photo. Use Dodge and Burn tool (O) to give the cloudy background a more interesting look. You can also add a new layer on top of the clouds to draw in some areas with black (use large soft brush).
Add a Curves Adjustment Layer, and on top of that a Brightness/Contrast Adjustment Layer.
Additionally, you can add a Color Balance Adjustment Layer to add some blue colors.

Adding the Water
Now for his brain, we are going to use the awesome Free Willy photo. It is a good idea to handle the fish and the water separately now, so begin with adding the water. Use preferred selection tools to select the water, then paste it in our document.
Use the transform tool (Ctrl + T) to fit it in the nerd’s head. Set the Blending Mode of the layer to Linear Burn.
Add Adjustment Layers to make the water look more interesting.

Adding the Fish
Adding the fish should be very straight forward. Cut out the fish and paste it in the final document. Apply a Curves Adjustment to crank up the brightness/contrast for the highlights.

Adding the Balloons
The balloons are simple as well. The first balloon (behind the fish), will be a play with perspective to make it look like the fish is actually lift up by the balloon. The right balloon only requires one Curves Adjustment Layer to blend in.
For the left balloon, we want to make it look like it is behind the clouds. To do so — duplicate the first balloon, scale it down and flip it horizontally (Ctrl + T). Use Hue/Saturation dialog (Ctrl + U) and the Channel Mixer to change the colors of the balloon. Create a new layer above the balloon, draw in some white blobs to mimic clouds. Then add a Brightness/Contrast Adjustment Layer to darken parts of the balloon so that it really appears further away than the right one.

Sky Details
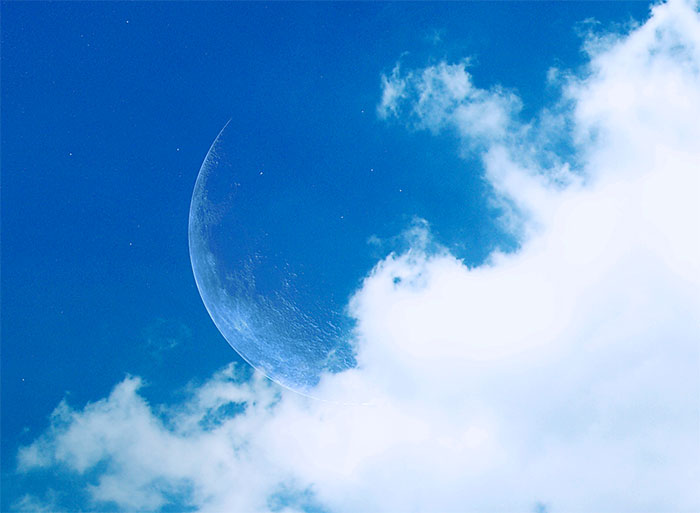
Import the You asked for the moon? photo. Set the Blending Mode of the layer to Lighten and set the Opacity to 62%. Scale it down and place it somewhere in the clouds.
Desaturate it (Ctrl + Shift + U). Add a Color Balance Adjustment Layer to give it a blue touch of color.

Now use a soft small brush and add some white dots to mimic stars.
Ground Details
Wouldn’t it be nice with some cloud reflections in those pools of water laying on the ground? To create this effect, duplicate the Clouds layer and flip it vertically. Scale it down a bit and add a Layer Mask to fit the reflection in the pool of water.

Wall Details (Vegetation Part)
The walls look a bit sad and does not really fit the rest of the image. To fix this, I decided to add some vegetation! This part is the hardest part of the tutorial and it requires patience.
Open up any of the grass or ivy textures in a new document (provided in the introduction of this tutorial). Select Edit > Define Pattern and click ok. Close this document and go back to the final document. Create a new layer and set the Blending Mode to Pin Light, then use the Pattern Stamp Tool to add random blobs of texture to the wall.

Change texture and continue to add details. Nature is random (mostly), so be random and do not fear to experiment with this tool!

More details. Also, blending in some parts of bigger vegetation will make it look more realistic.

You get the idea…

Use flower textures to build your custom flowers to add a bit of interestingness to the image.

Final Result
I removed the bottom left flower, it did not really fit in. Then I added one final Color Balance Adjustment Layer to neutralize and balance the colors. Finally I used the Unsharp Mask filter again, to add some details to the vegetation.
Details (still not at 100%, remember this is in A3-format 300 DPI)


